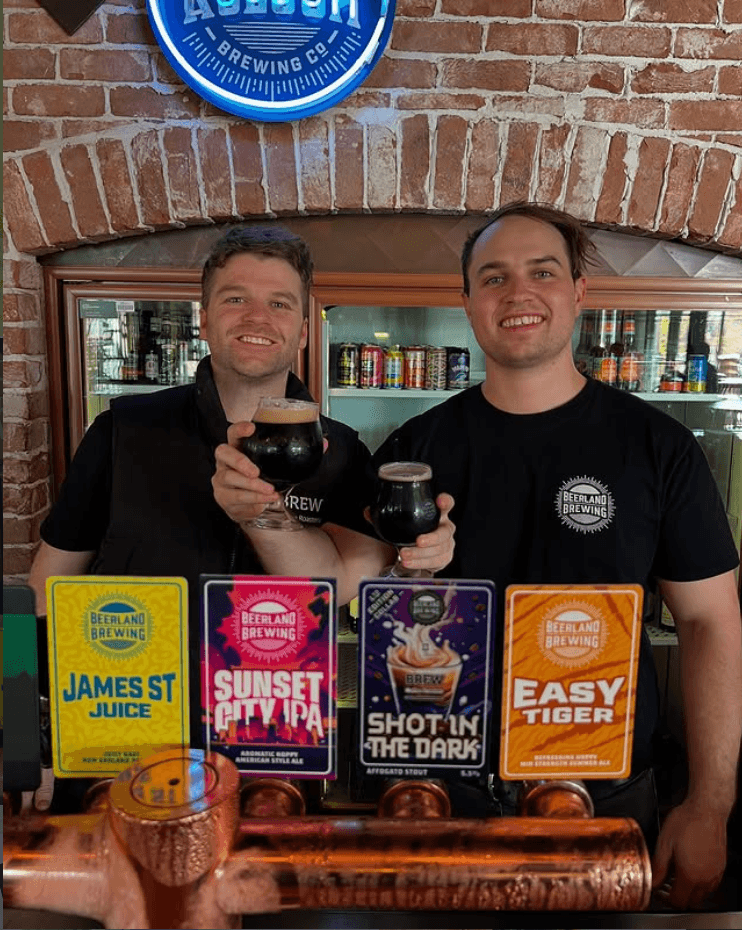
December 11, 2023
Brewing the Best Memories with AeroPress: The Perfect Camping Companion
Why The AeroPress Reigns Supreme
There’s an incredible variety of methods to brew coffee, especially when you’re outdoors. Yet, the AeroPress has proved to be our favourite travel companion, and here’s why:
Durability: You might remember the innovative, indestructible “superdisc”, made by Aerobie. Believe it or not, that’s the same genius behind the AeroPress kit! Made of polypropylene, and stainless steel, the AeroPress is designed to withstand knocks and drops without a scratch.
Lightweight: We know the struggle of having to choose between the essentials when loading the car up for a road trip! Fortunately, the AeroPress Kit cements coffee as indispensable when having this conversation. Weighing just 175g, It’s the ideal travel buddy for almost all adventures.
Grounds Management: Once you’ve finished brewing, the coffee grounds compress into a neat puck, which can be easily discarded, prepping the AeroPress for another round. Who said cleaning had to be a chore?
Consistent Quality: Every cup made with the AeroPress kit is not just good, but great. Its consistency has garnered a cult following, leading to national AeroPress coffee-making contests!
Accessorise Your Brew
While the AeroPress kit is a marvel on its own, here at Brew, we offer additional bits and pieces to elevate your next outdoor brewing experience. Cold coffee is nearly as bad as no coffee! It’s essential to keep that brew hot and steamy (or icey cold if that’s more your speed) when kicking back in the outdoors. The Fressko coffee cup interlinks style and sustainability, keeping your brew hot (or cold) for up to 3 hours!
Understanding The AeroPress Kit
Comprising of:
Brew Chamber
Plunger
Filter
Filter Cap
Brewing with the AeroPress
Two techniques dominate the AeroPress world – the Traditional and Inverted methods. Both have their merits, so it’s all about personal preference.
Traditional Method: This involves placing the brew chamber directly atop your mug and allowing gravity to play its part in brewing. This method may lead to some under-extraction but is great for larger mugs.
1. Preparation
Place a filter inside the filter cap.
Attach the filter cap to the brew chamber.
2. Setup
Position the brew chamber on top of your coffee cup. Ensure the filter cap is facing down.
3. Coffee Addition
Grind approximately 11 g of coffee beans to a fine consistency.
Add the grounds into the brew chamber.
4. Bloom
Pour 200g of off-boiling water into the brew chamber.
Place plunger on top of the brew chamber creating a seal.
Start the timer and let it sit for 2 minutes.
5. Brew
Continue pouring water into the brew chamber until almost full.
Let it sit for 90 seconds.
6. Plunge
After waiting, give the Aeropress brew chamber and plunger a “swirl”.
Slowly and steadily press down, taking about 30 seconds.
Once you’ve reached the bottom, you’re done!
Inverted Method: By turning the AeroPress upside down, you create a sealed chamber, ensuring no premature seepage and more control. Suitable for an 8 oz brew.
1. Preparation
Insert the plunger into the brew chamber’s back, pushing it in just about one centimetre
Turn it upside down so the plunger is at the bottom.
2. Coffee Addition
Grind 16 grams (roughly 5 tablespoons) of coffee to a semi-fine texture.
Add the grounds to the brew chamber.
3. Bloom
Boil water and then remove from heat.
Pour a bit of water into the chamber just enough to wet all the grounds.
Wait for 10 seconds to let the coffee “bloom”.
4. Brew
Pour in the rest of the water, filling up the brew chamber.
Let it steep for 60 seconds.
5. Filter Preparation
If using a paper filter, put it in the filter cap and dampen it slightly. If using a metal filter, set it gently on top of the chamber.
Screw on the filter basket.
6. Flip & Plunge
Carefully position your mug upside down on the filter basket.
Holding both the AeroPress and the mug, flip them so the mug is on the bottom.
Slowly press down on the plunger, taking about 30 seconds.
Once you’ve pressed all the way down, you’re finished!
Post-Brew Rituals
Cleaning the AeroPress is a breeze. Eject the puck, give it a rinse, and store. A tip: don’t compress the plunger inside the chamber for long to ensure the longevity of the rubber ring.
Dealing with the Uncommon Blowout
Rare but recoverable, a filter blowout happens due to misalignment. If faced with zero resistance during the plunge, remove the plunger, rinse, and restart the inverted method.
A great coffee experience isn’t just about the brew but also the journey. With school holidays approaching, the joy is in the memories made, stories shared, and the delightful cups of coffee enjoyed together. The AeroPress Coffee Kit promises not just an excellent cup of coffee, but also unforgettable moments. So, wherever you end up these school holidays, make sure the AeroPress Kit is part of your adventure. Happy brewing!